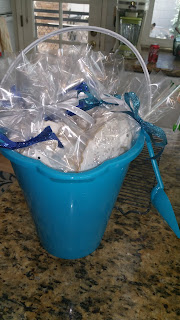
Saturday, October 17, 2015

Cake #28 - Wedding Sunflower Cupcake Bride and Groom Cake project

Cake #28- Wedding Sunflower Cupcake Bride and Groom Cake project


This was one  of my most ambitious projects in quite some time,  but I loved it. I was asked to do a wedding project that started out as 36 sunflower themed cupcakes (no problem) but which turned into 140 cupcakes and settled down at 120 plus a double layer 8" bride and groom cake (you know the one that is usually the top tier of the wedding cake that the bride and groom put in the freezer until their 1st anniversary.)  Half were to be plain white frosted and the other half decorated as sunflowers. The vision of the wedding planner was to fit the Fall country style of the wedding, and included a gorgeous display of a couple of wooden crates among which were scattered the cupcakes with the bride and groom cake on the top, and among the cupcakes were mason jars with tea lights, some string lights, artificial flowers and maybe a photo in a frame or two of the bride and groom. I thought..sure, I can do that! 

The trick was to make sure everything was done fresh, yet ahead of time enough to make sure I had time to decorate everything especially the sunflowers which turned out to be quite labor intensive. Each sunflower was made of one Oreo, or two or three smaller ones. As I  went, I learned the single Oreos stayed on the cupcake tops more securely as the two and three ones tended to bend somewhat in the middle causing the icing to crack. Mostly I just added more icing to cover it up, but some of the small ones got a little thicker than I wanted for this reason. 

At first I intended to frost the cupcakes individually and with a softer but sturdy buttercream/shortening frosting and the pipe the sunflowers onto each individual cupcake. The wedding was to be an evening outdoor wedding, and the weather was calling for monster heat here in CA all week. Thus, melty cupcakes wasn't going to work.As I experimented with a royal icing sunflower, I decided the safest way to create the sunflowers to last was with the royal icing dyed buttercup yellow, and with the leaf tip, piped onto the edge of each Oreo. I did a bottom layer of petals, probably about 15-20 presses, and then another layer of petals on top 15-20 presses, and then the final layer of actual "petals." Needless to say my arm and back hurt by the time I was done with 75 of these 3 petal layered cookies but since I spread it out over time, it wasn't too bad.
(I froze some of them to try to improve the drying but found that just drying on the counter in a fan was good enough and made them very easy to put (adhered with frosting) right to the top of a green frosted cupcake.Using green allowed me to get the "look" of leaves without having to fit more piped work onto the cupcake.)

One day I made 15 of the sunflowers, the next 15 more and the final day, another 30 plus 15. This gave me the extras I needed to put on the Bride and Groom cake to cascade off of the side.
 This too worried me if I would be able to pull that off, as with the heat especially, using anything other than royal icing wasn't likely to stick to the side of the cake. I could see it---beautiful cake made in the shop, but the minute it's transported elsewhere, it slides right off and gets ruined.

The planner initially wanted to pick everything up and didn't seem to want them boxed. I initially wasn't that concerned about "delivery." I just assumed she had like 10 cupcake holders or was borrowing some from someone. I had 3 I could loan, but as I went along I realized transport was going to be a big component of the project that I needed to really consider, lest my hard work all go to waste if she didn't have that many transporters at the ready and they got ruined on the way to delivery.   Fortunately I had bought these awesome cardboard cupcake boxes that held a dozen cupcakes each, (that I would have returned if I didn't need them), but ended up using all of them and they were just terrific. They were only a few dollars each, were easy to assemble, really sturdy, had a glassine top so you could see the cupcakes, AND an insert for the cupcakes, with finger holes at the edges, to help remove the cupcakes without disturbing them. I would definitely buy them again.(Maybe I will put the link here for the place that sells them if I remember.

I initially packaged all sunflowers in one box and all white cupcakes in another. Then I realized how big the sunflower cupcakes were in relation to the whites and decided to pack the remaining  boxes with one white cupcake to one sunflower like the photo at the top, such that the sides of the sunflower hardly touched anything this way.  I was sure they would dry better and be more easily removed once they arrived at the destination. 


 The 8" double layer fondant-like smooth frosted cake itself turned out great, though it will presumably land in the freezer for a year now anyway--but I am confident when it comes out to celebrate the first year of marriage, it will still be delicious! 


 The bride also wanted some sunflowers spilling down the side of the bride and groom cake, and when I contemplated how to go about it, initially felt the flowers would "run" off the side so they would probably have to be on top.  As I  created the 75 or so sunflowers I ended up using on top of the cupcakes, I found they were so sturdy that they could indeed be placed aside the bride/groom cake, which I understood would rest atop one of the crates so that would be the high point and the cupcakes would cascade down the different crates to the bottom layer. I made a handful of extra sunflowers to use in the event that some of them broke, and had enough left at the end that I thought I would use them all on the cake sides and on the top. I definitely liked the look.

The ribbon on the cake was my least favorite part--at first. I used wired ribbon so it would hold its shape too as it surrounded the bottom of the cake. I felt that would probably be enough to join the cake bottom to the cake plate, but it really wasn't. AND I was really disappointed in myself that I picked the silver mirrored cardboard cake plate bottom, as silver just didn't seem to go with our Fall colors. Oh well, too late! However, I later learned that their floral centerpieces were exactly the same Fall colors in the ribbon, plus silver sprigs of a cattail type of "flower", so it actually looked like it was going to blend/match perfectly.

 But alas after I put it on, the ribbon took on the grease from the butter in the frosting and didn't look so great. I put it back in the freezer until the next day to contemplate my options--when you aren't sure what to do about a problem, do what I do, if you have time--really, just sleep on it. It's funny how ideas do come in one's sleep or by morning.


Thankfully while I had a couple of ideas, by the time I took it out the next day, it actually looked fine as the grease had by then, absorbed into the entire ribbon so that it was not splotchy like it was the day before, and was not noticeable at all. The ribbon merely looked a little darker in color all over, than it did the day before.


So I went with it, and then assembled the sunflowers on the side with more royal icing as my "glue". I felt I still needed a pearl dot border so I added it where the ribbon met the cake plate and after I put on all the sunflowers I had left, I was done.


After the Bride and Groom cake was done I went to work on the cupcakes. Half were white frosted in a thick swirl pattern,  and the other half green frosted like big flat petals. The sunflowers were set atop the green ones and allowed to firm up and dry.


I added a few "ladybugs" here and there by using red M&Ms and painting on black dots.

Delivery in the boxes was super simple and as I understand it they all made it fine to the reception, such that this now become probably my favorite project next to Shannon's Movie Night Birthday event at the theater, see Cake #4  and #4 Revisited where I posted a few more pictures than I did the first time.:-)


Cake #4 Revisited - The Movie Theater Cake

Cake #4 Revisited - The Movie Theater Cake from about 5 years ago.


When Meghan first started this blog some years ago, she put in a small pic here and there. I think the idea was mostly to showcase one cake every couple of weeks/months until all the ones I have ever done and photographed were posted! Ha Ha..like that will ever happen.

So when Cake #4 went up, there was only 2 pics of this rather ambitious project, and while I won't do too much explaining, I did want the pics up here too. It was a fun tiered cake that I was able to frost smooth like fondant, and then decorate like a movie theater event. This happened mostly because I stumbled upon just the right ribbon that I was able to make look like a film reel by leaving it on the spool it came on and just adding some grey and white colored fondant to the top of it. I bent the ribbon back and forth every couple of inches so it resembled the frames of a film reel. Shannon decorated the white bags with the red and white stripes and the popcorn sign.


 I  used mini marshmallows "painted" yellow with food coloring and snipped with scissors twice, to make them look like popcorn inside.


Friday, September 18, 2015

Cake #27 - Margaret's Wine Theme Bridal Shower - Red Velvet Cup-Cakes

Cake #27 - Margaret's Wine Theme Bridal Shower - Red Velvet  Cup-Cakes

This one was posted briefly as cake #1 before we numbered them and when Meghan was just trying to display each cake without any kind of backstory or explanation on how to recreate this yourself.
 :p

Margaret was getting married--in wine country. Her bridal shower required a wine themed cupcake of course. To do that I decided to use "wine" type glasses and "wine" colored cake. I used a red velvet, baked in the usual cake pans, but cut into smaller pieces/chunks and put into the glass, topping the "cup"cake cake pieces generously with delicious cream cheese frosting and frosted grapes/sprinkles for decoration. 


I originally planned to use plastic wine glasses with the long stems, but they were too small to put in enough cake, and moreover, they were very "tippy", so I found the short stem ones that turned out just perfect. They were all assembled in groups on either the pretty grape plates that Kathleen had on the table, or on the wine and grape leaf metal tray I had. We used both. The cakes were very easy (and bridal shower-delicate) to eat with a fork right out of the  the "glass" and I think the glasses made for a nice "centerpiece" to the table--so did Meghan! :-) 


After frosting them, to emphasize the red color  I sprinkled some thick reddish frosted sugar sprinkles.


To complete the look, I added frosted red grapes. I frosted them by wetting them with a little water  and then rolling  them in granulated sugar. The sugar adheres to the grape and it all hilighted the wine theme nicely.

Thursday, August 20, 2015

Cake #23 - Pastel Decorated Easter Egg Cake

Cake # 23 - Pastel Decorated Easter Egg Cake


This one's a fun one at Easter. I have done these egg cakes for years, sometimes with 3 smaller decorated Easter eggs. Now that I have a special "Wilton" cake pan shaped like an egg, I just do one. (I used to do a sheet cake and carve it oval....what a pain.) Normally in our family, one slice of a single layer cake that is not filled is plenty, and this one serves so easily.

The fun part about this cake was the decorating. I just did my white buttercream (using clear vanilla to keep it as white as possible) as a "blank slate" on the egg itself and made multiple (4) colors of tinted frosting in the typical Easter pastels--all strong colors for this one. I started with the yellow with a star tip, then blue with a thick writing tip. The pink was done with the star tip again and the green with the smooth writing tip for variety. Of course a star tip was used for all the shells, which is easy to do if you area sure to use a coupler on your icing bag for all 4 colors. Fortunately I have accumulated many couplers over the years, and at least 2 of each star and smooth writing tips in various sizes.


I started with the yellow and then put on the bunny decorations to ensure I had enough space and the bunnies didn't end up stuck in any of my zig zags.


 Then came the blue.


Time to add the pink.


I had preplanned to do the outline of shells in an every other color pattern so for each shell I did I had to imagine how big 3 others would be so that I left enough room in between colors for the other colors.  Here's the cake up until the last color--green--was added.


I added the green and finished the shell border, but felt it was still lacking something and there was too much white space left, thus the green polka dots.  I had written the "Happy Easter" at the blue stage again to ensure I had enough room to write it without covering up any of the pattern.


Sometimes I make my cakes a requested and sometimes just as inspired by certain random things. This was a great example of the inspiration that came from the bunny candies themselves. The colors blended very well and it looked really great.   I was extra proud of how this one turned out. :-)


Sunday, August 16, 2015

Cake #25 - Sea Theme Sugar Cookies (Crab, Seahorse, Fish, Sea Turtle, Starfish)
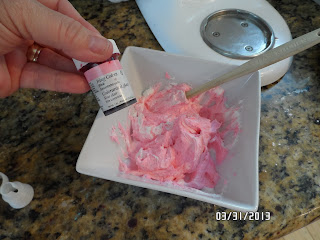

Cake #25 - OK not cake again, but rather my super Sea Cookies (Crab, Seahorse, Fish, Sea Turtle and Starfish)  made for a birthday party earlier this year. This was probably one of my favorite projects!


This project was made by request for a young girl's birthday party. She had a "sea" theme and wasn't particular as to which sea creatures we used. That was good because on short notice I had a little trouble finding cookie cutters to fit the theme. I hunted at (and called around to) all my local craft stores and it figures, nobody would have even a simple fish.

 I sent my husband on a hunt near his work to pick up one that I thought would work, and even bought a set of 100 various cutters, but they were all really random, and not worth it for the one fish in the 100 that was frankly just too big anyway. So this is when I learned about Amazon's fabulous one day delivery on certain things. I love Amazon already for many reasons, but this was just truly fabulous. I really didn't believe I could get what I needed in one day, or in one case, SAME day, and how reasonable priced it was, so I took a chance and ordered several of these metal cutters all of which were delivered right on time and were all the right size.  I had a hard time deciding which to use, and which to return. The ONLY one I sent back was the mermaid as while it was cute for sure, I could see the decorating would be way too intricate and time consuming for this project.


The starfish was done in blue, with blue sprinkles and white dots for the accents. Eventually I found my edible light blue pearls and added 2 or 3  pearls at the end of each arm to ensure the tips were perfect, while the upper "arms" were in a variety of bigger sizes for effect. If you look closely you can see them at the very tip.


The fish were really an afterthought. I hadn't planned to make the fish, but after I had some extra dough and wanted to see how they would come out, it turned out to be one of my favorite pieces in the project. They were just the right size. Not too big, and not too small.  This fish had a candy eye (readily available at the craft stores or online in packs of 50 or more) . I used my edible gold pearl candies by dropping them one one by one to create the stripe behind his eye and the one in front of his tail. I made a few plain blue fish too since I had leftover blue icing, and covered him with "scales" of blue crystal sprinkles.

The sea turtles were made by creating the shell with the green outline, flooding it green and then doing the brown legs and head with an outline and a flood of icing. I then sprinkled the green sprinkles on the shell while it was still wet and then added the criss cross after it was all dry. To fancy it up, I put on 2 edible gold pearls on each foot and hand to represent toes and fingers. I then added 2 black steel pearls for the eyes. This was a little more tedious of the  creatures in the project as you had too drop each "toe" and "eye" precisely or it wouldn't look right. To help with this part I used a toothpick to move the "toe" or "eye" around if it didn't land quite precisely where I wanted it to. (I did this with the eyes too.)


The crabs were created with more candy eyes and the edible gold pearls.  I thought about making them red, but decided on the orange to fit the color theme and match the buckets. Next time I might try a red one anyway and see how it looks. Red might have been better since the fish were orange, but alas the fish were orange only because I had leftover orange icing or the fish might have been red. :-) 

While at first I wasn't that fond of the crab like I was the Starfish above and the Seahorses below, he grew on me after I put on the gold pearls to resemble the lumpiness of the crab shell. They were the thicker of the cookies and though they held up pretty well, I did lose a claw or two on a couple from handling them.  I glued those back with frosting and kept them for family treats, but next time I will be sure to make the cookies thick enough to avoid the claws breaking off. 


This picture above does not do justice to the seahorses! They were rather plain, but kind of beautiful actually in their stark white splendor. They were made better when I found I had a leftover vial of silver edible flakes (I think they were in the shape of stars--they make them in hearts and other shapes too.) I had used some of them for Jacks' Hockey Birthday cake and had plenty more. They are about $7.00 vial so thankfully they do go a long way. I was able to use about 2/3 of what was left on these seahorses and it added the beautiful accent they needed.

I made extras of these cookies I liked them so much. Shannon brought a few to her friends at school, and before you know it I had more orders for individual cookies--another dozen or two at least. That was fun. Shannon was such a great salesperson too!

For the project I was requested to wrap each cookie individually so I did and tied them with small wired ribbon in either a matching or contrasting color to the sand pail I was going to use.


 I filled the four pails with newspaper topped with a foil covered paper plate and then sat the wrapped cookies on the plate. These extras were attractive, easy to carry and deliver the cookies in (and without too much pressure on them so as to avoid breakage) and yet very inexpensive to put together.


The pails I bought were from the local Dollar Tree. They did not have the colors I REALLY wanted, but I bought them anyway. Rather than get the pails back, I figured I would just give them to the customer. But I just didn't like the colors and how they took away from the color scheme of the cookies, so I had a couple of blue and green personal pails I had left from Easter (more expensive ones) and decided to use them instead as I couldn't live with things not quite matching right.  I did let the customer keep them and tried to return the other ones and found out that at the Dollar Tree store, you cannot return anything, so alas, I am ready with a yellow, pink, orange and green set for the next order. I can use the pails for my surfboard and flip flop themed cookies too (see Cake #13) should I get another order!