Sunday, March 1, 2015

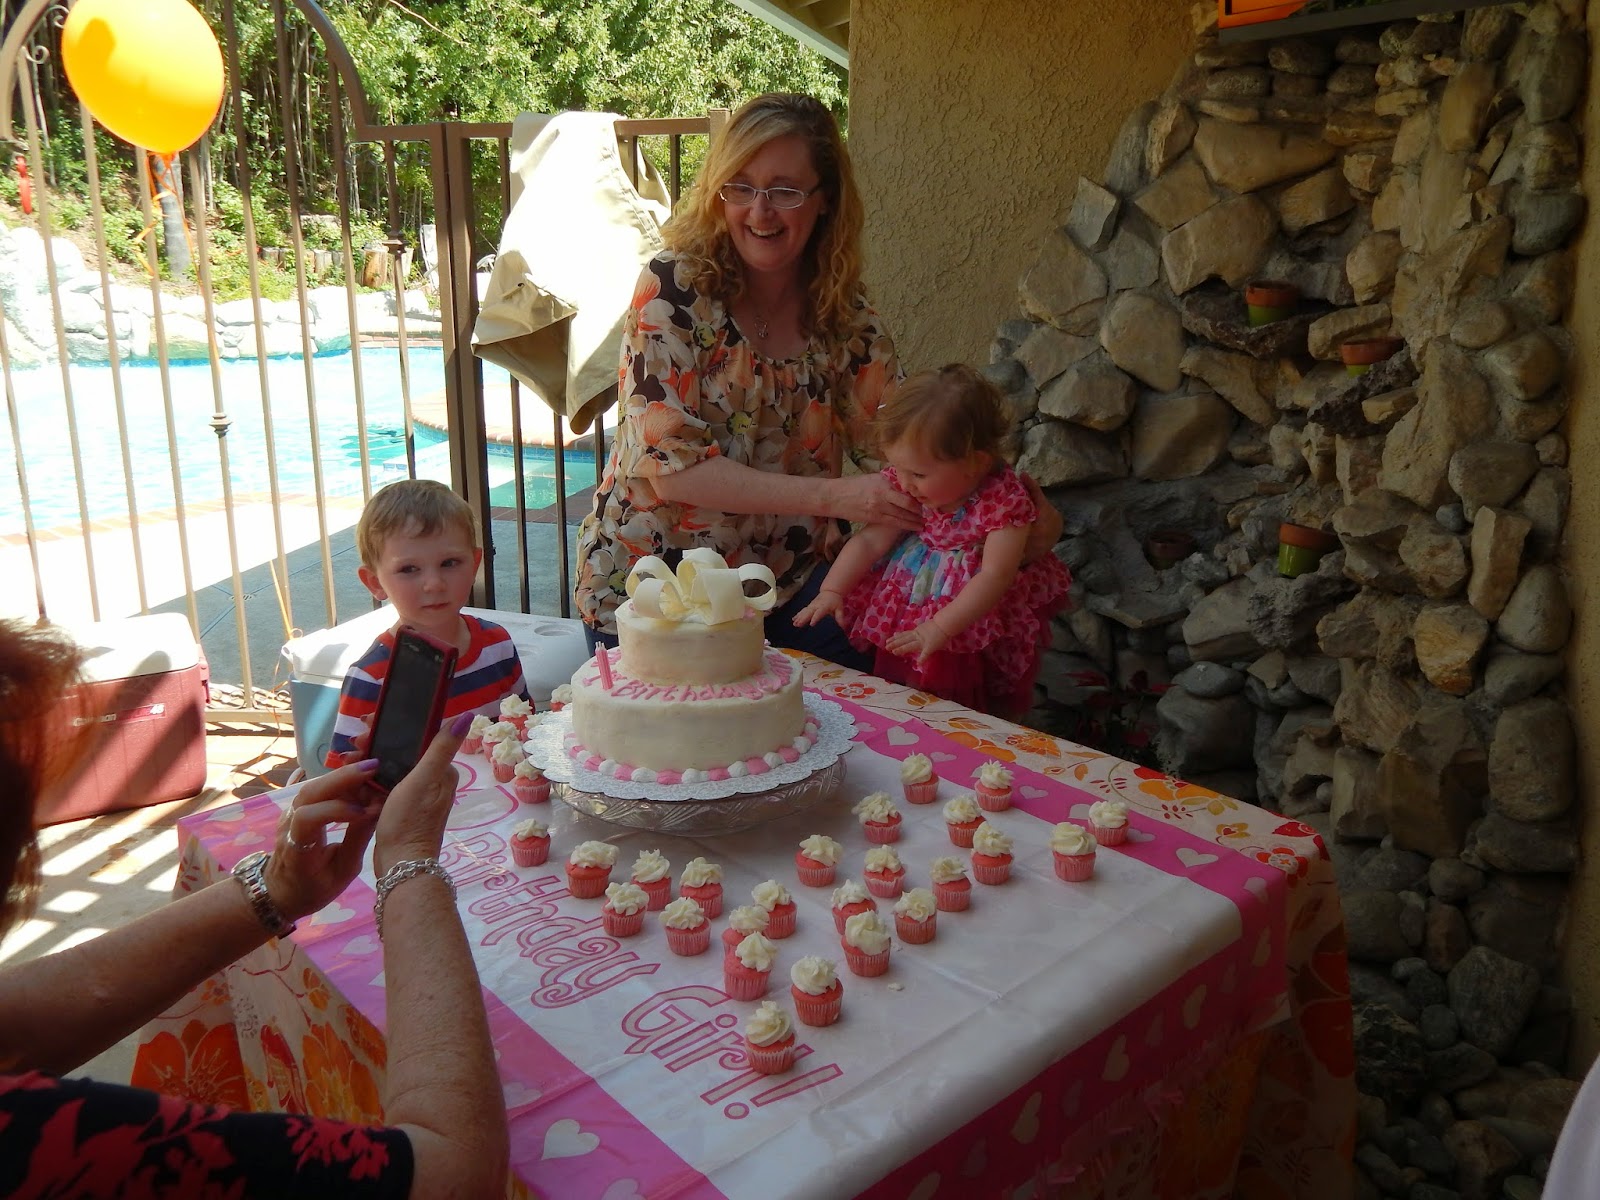
Cake #16 - Pink Bow cake for Cara Elizabeth's 1st birthday.

Cake #16 - Cara Elizabeth's 1st Birthday Pink Bow cake

Cara Elizabeth was born the same day as me! March 13. Different year of course. To celebrate her first birthday, which was almost this same time last year, required something pink and dramatic--baby-like but growing up, and feminine but not so much that it scares off her boy guests (including her cousins and brother.) Of course, it had to also taste delicious.  I came up with this.


I decided to create this pink and ivory colored white cake with the most delicious strawberry cream filling, and a used my regular butter cream frosting in a smooth finish to mimick the look (but thankfully not the taste) of fondant. In pondering the design I found a recipe for a huge, beautiful white chocolate bow and decided to venture into the rather new experience for me of chocolate making. (It was way way easier than I thought.) I used the bow as the centerpiece and basically created the cake around that and the pink/ivory concept. (Ivory is actually a great frosting color as it's what you get with a standard butter cream and don't have to do anything with it. Trying to create a pure white frosting is actually not as easy as ivory.) So if ivory works, go with it.

I recalled having my round pan set...a really big one, medium size one and a small one, so decided to use the big one and put the small one on top (which I did a few years back for Shannon's "Movie Cake" to be posted soon!) I planned to mount the bow atop the small one and the small one atop the big one. 

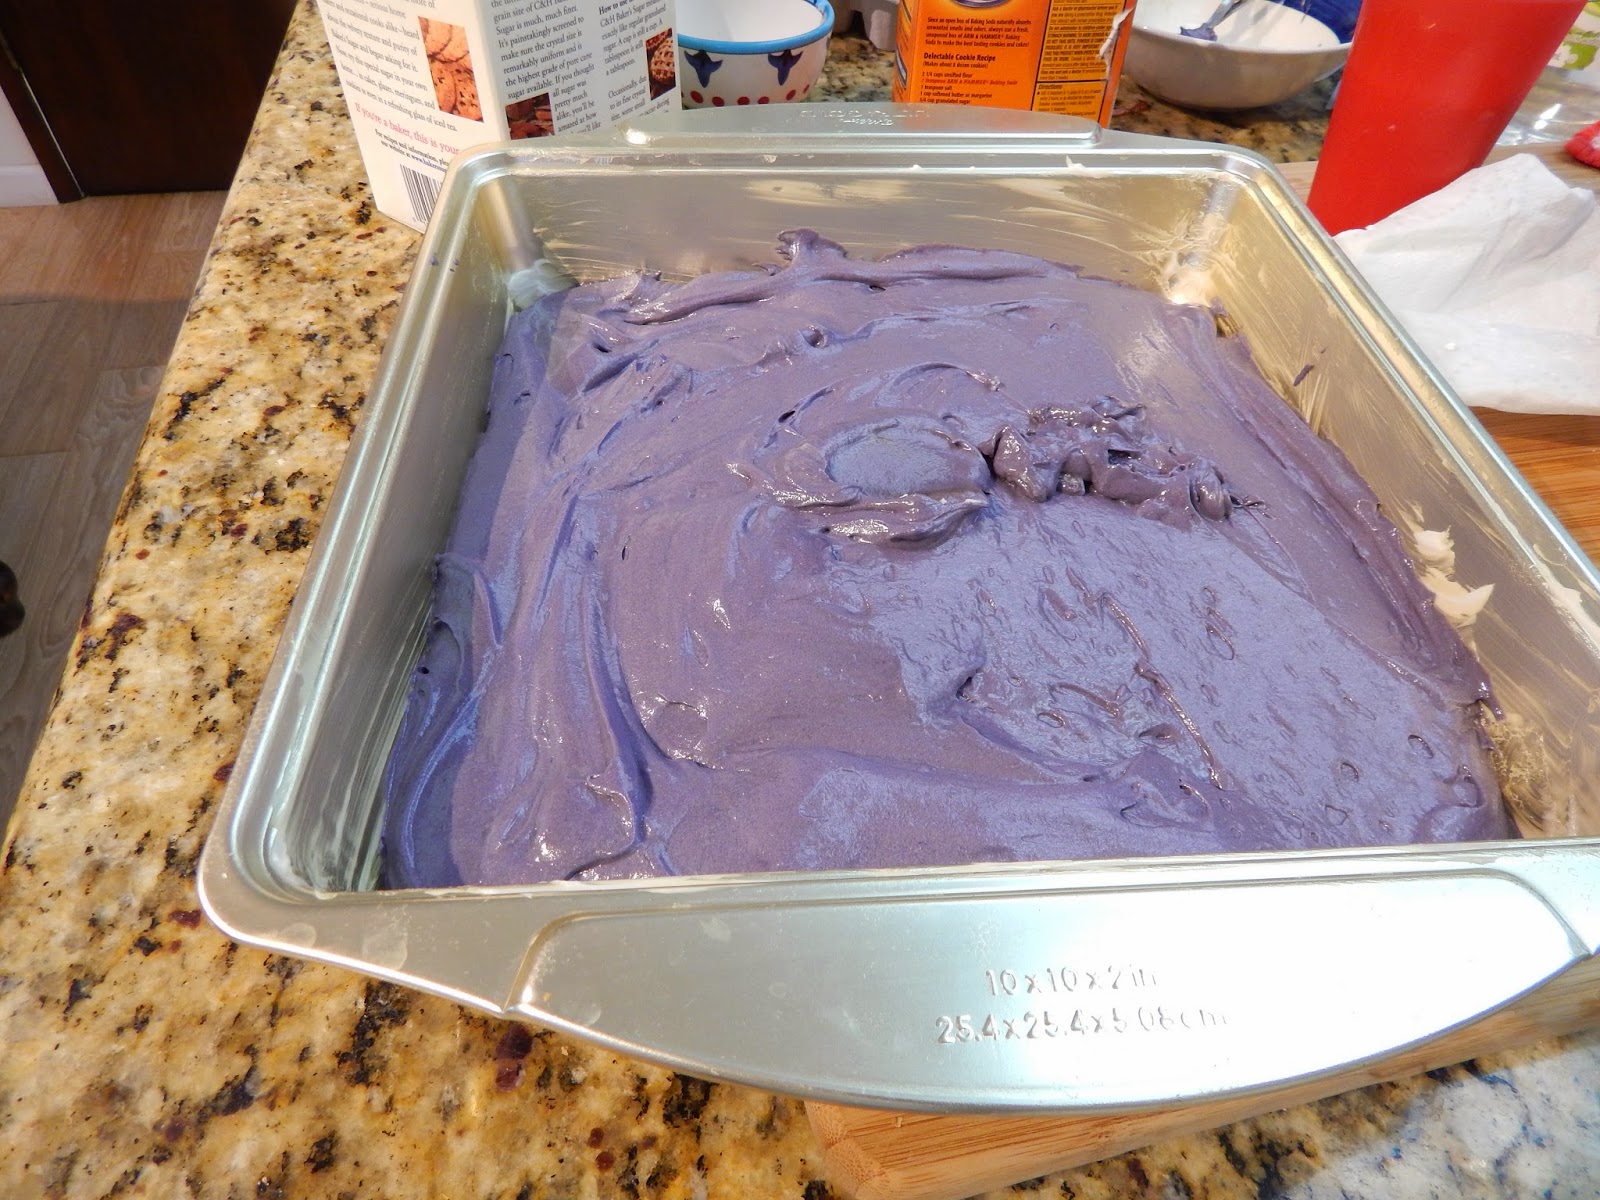
 I decided with the number of guests expected, I would make the cake a little bigger and taller, by making one batch of batter in white/ivory and split it into the big pan and the small pan. Then I made another batch of batter and dyed it hot pink and split it into the big pan and the small pan once the first batch was done. This way I could fill between two very thick layers and make the cake much taller like a wedding cake.The second photo below is after I trimmed the curvy tops off of the cakes to make them fit better together. I have to say I often DON'T do that, mostly because I hate to waste those tops...to me, the best part of the cake!


I then made my filling which was a strawberry jam, whipped cream mix, and after the cakes had cooled put it between the colored pieces such that the small piece had a pink bottom, strawberry filling and a white cake on top, and the same with the bottom layer, eventually mounting them on top of each other. In this case, to keep the cake stable, I froze the filled layers for a few hours, which helped set the crumbs a bit and also ensure the filling didn't "squish" out as I worked with the cake.


I put the cake on my pretty (and inexpensive) cardboard cake plates to help hold it for transporting. I then frosted the bottom layer with my standard butter cream (basically 2 sticks of softened butter, 6 cups of powdered sugar, regular vanilla or Madagascar paste when I can get it, and heavy cream or milk to thin it out.  If it gets too thin, then add more powdered sugar.) I smoothed the frosting to make it look like fondant (what I have done forever, even before there WAS fondant) on the bottom layer by applying my offset knife dipped in hot water every other stroke or two until it was complete.  I put the 2nd smaller cake on top and then did the same thing.

I debated leaving the top layer right on top of the bottom layer, versus using my white plastic divider plate on top. I figured the divider plate wouldn't look as good, as it would be visible,  but it would sure make it easier to remove that top layer for cutting and serving it neatly. If you don't use the divider plate, you can use a long toothpick (usually 2 to 4 of them) that holds the top layer to the bottom, since the frosting alone isn't good enough if you have to transport it. In this case, I used the toothpicks--just had to remember they were there so that nobody got a bite of pokey wood!


I then made some pink with my butter cream, to use on the border and to write Cara's Birthday message, and put it in a decorator bag. I also put some of the plain in a decorator bag too with the "shell" tip..fortunately I have a whole bunch of them. I then piped the shell border onto the bottom layer to blend the edges of the cake with the plate. I alternated pink and white even there for effect since there wasn't likely to be much color on the cake other than the pink. (I was a little disappointed though as the consistency of the frosting was a little thin to hold up in the shape of the shells and I didn't notice this until after it was already in both decorator bags, so I really couldn't easily add more powdered sugar like I would have if it had been in the bowl. In another shell or two, I also saw I hadn't mixed the color as well in the bag and it came out a little streaked in a way I didn't intend. Had this been for someone other than a 1 year old, I might have redone it, but I was o.k. with it that day.)
 

 I then started working on the bow. You make the bow by getting first the quantity and color of chocolate you need. Today in craft stores and party stores, it's soooo easy to find a bag of easily meltable chocolate wafers in many colors. I had ivory and a whole bag of them.  So I melted them in the microwave, in a ceramic bowl,  after I had cut strips of wax paper that were about 1" wide by about 10" long. (You could do them wider, but smaller might break too easily. In fact, expect you are going to break a few parts of the bow, so make more pieces than you think you are going to need.)


Using a pastry brush, spread a thick portion of the melted chocolate on the strip, with the edges as straight as you can along the paper. Fortunately, if you go slightly over the edges, (use more wax paper underneath as your work surface) that piece will break off and you will have a nice sharp edge to your "bow." Make sure it's relatively thick, and while it's still cooling, turn the chocolate covered strip on it's side and fold it in half, leaving an open loop on one side and put the two ends of the waxed paper together so they melt and harden that way. 

I let them harden and basically went and finished the rest of the cake. When I was ready to assemble the bow about an hour later,  I removed the wax paper strips from each piece/loop of the bow, and laid each loop gently on top of the cake in a circle, directly into a small mound of frosting which was going to act like the "glue." I ended up making 8 or maybe 10 loops and using 5 around the cake and one in the center. Yes, I broke two. (What I do now, is I also make one or two round loops--that is, without the long "leg" at the end of the loop-- to use in the center of the bow to make it look more finished.  It's a little trickier to keep the loop round with the wax paper in the way, but not impossible.) 

Since I was "driving" this cake to the party, I decided to put a little more frosting on top of all the assembled pieces of the bow before putting the center piece on, hoping it would dry and hold it in place even better. (What I do now, is also make a small batch of decorator frosting or one with meringue powder that does dry a little harder than regular frosting, to ensure the bow doesn't move. It does work better for sure.)


One other touch I added, was the mounting (in dots of frosting) of a few little ready-made pink sugar flowers I happened to find at the craft store earlier in the week. The colors matched exquisitely and they added a teeny tiny touch of yellow color in the middle of each flower, to break up the monotony (if you could call it that) of the pink and white.

Then it all went into the fridge to stay "hard" until the party. Whew.

I should note that with the number of guests expected, and many of them "little" I made my usual baby cupcakes too also in pink, with white paper cups (since white cups generally show through the color of your batter) to show off my pretty pink mini cupcakes. 


I used a small dollop of large-shell-tip piped frosting and the color match came out great. I found some pink candles - only needed 1-- and delivered it all atop the glass cake stand for the Birthday girl!


 OK, I should have taken a better photo of the inside BEFORE it got all mowed up...I kind of forgot, but it was quite pretty when it was served, easy to serve, and definitely delicious. 


Happy 1st Birthday Cara!

Thursday, February 5, 2015

Cake #15 - Throwback to Kyle's 3rd PIRATE birthday

Cake #15 Throwback Pirate cake - Wow. This makes me feel old, to see my little guy, Kyle now almost 10, looking so tiny in his Thomas-the-Train pjs. Boy he was cute (and still is, but in a different way.)

Kyle loves baseball--is really good at it actually. His Placentia PONY baseball team (age 9U--for "and under") almost took the championship of the World Series of PONY baseball up north last summer--missed it by one game and a 2 point difference!  They plan to have a go at it again this season, so we are definitely a baseball lovin' family. What does this have to do with anything you ask? Well, this morning I heard my cute little nephews--Kyle's younger cousins--say that tonight is their first night of Spring PONY baseball practice. Their new team is the "Pirates". I thought what good "Pirates" they will make. "Pirates" stuck in my head.

So, being a lawyer, and having already had a heavy lawyer week and not wanting to do too many heavy lawyer things today, I  decided this might be a good day to bring in the throwback photos of Kyle's little "Pirate cake."


This was when he was 3. I needed to make something for our little family party that night--not that many of us coming--but also something else to take to his class at school the next day. (This was "way" back when it was o.k .to actually have delicious treats for birthdays at school, not like it is now with raisins or stupid pencils.) So we worked on both things simultaneously--the cake and some little transportable treats.

PIRATE CAKE 

The pirate cake was made with two typical 8" pans filled to the normal amount and then cut and divided to make the hat. (Did you know a pirate hat is technically called a "tricorn" hat? Of course mine was only a a duo-corn hat, if there is such a thing--no third part, but still relatively authentic I would think.) About one third was cut off of each round and the big parts put together, with frosting in between, to make the main/center part of the hat. The remainder was shaped and trimmed and put together for the "wings" part of the hat. It was "glued" together with a thick coat of frosting. All was frosted in chocolate, probably canned frosting in those days, if I remember correctly, and I bet it took 2 cans of chocolate and 1 can of "white." 

I actually like canned frosting o.k. in the right application.  It tastes relatively good--especially to kids--it's quick and easy and you can keep plenty on hand, and holds up relatively well on many cakes; but often it is too soft or thin to do much else with, besides a base coat or some simple piped on stuff. Piping that is too intricate or fancy sort of melts away when you use canned frosting, and  it
loses a lot of its shape. However for kids it's great really, because it's sad to waste a whole pound of butter and good vanilla, that normally goes into the "GOOD" butter cream, on little folks who can't really appreciate it anyway.

I also don't often use the plain white "decorator" frosting (usually made with shortening, not butter) as I just don't like the generally waxy, greasy taste of it. It is MUCH easier to work with for decorating, and coloring to get your "true" colors with dye, so I will use it from time to time, but I am pretty sure this cake was made with just a basic plastic can or two 'o stuff.


After the cake was assembled and coat frosted, I sealed the edges by piping on more chocolate, and then accented and "rolled" the corners  with white piped frosting, probably canned "white" again (not "vanilla", but "white" to ensure I had the dramatic color contrast.)  I drew the skull and cross bones with white too, and added the eyes and mouth again with the chocolate.


 Instead of writing ON the cake, I decided I would make it all look bigger and then fill empty space, by using a gold cake board I had (less 

than $5.00 at the local craft store) and wrote directly on the board. I then put on some gold foil covered chocolate candy coins I got at the drug store (leaving out the bigger ones) and using the white frosting, "stuck" them to the board, and each other in a pile, around the hat, and voila, done! Quite simple really.

It was easy to cut and serve too. I am often attentive with my cakes to the place and manner in which the cake will be served. Some cakes are awesomely beautiful, but can't be easily served or cut into enough pieces to serve the number of guests (i.e. see Cake #17 which I will post shortly--the coconut peach layer cake, beautiful but not all that practical to eat unless you love big,  thick pieces--most of us don't.)

 JELLO- COOL WHIP SCHOOL BIRTHDAY TREATS

With the cake finished, it was on to the school birthday party project. We stuck with the pirate theme. 


The little to-go pirate birthday thingies were plastic cups (don't forget the spoons) filled with two colors of jello with cool whip in the middle--like a flag--with little pirate ship "Happy Birthday" flags we made with our color printer, fancy scrapbook scissors and construction paper, stuck with tape atop cool black straws I had. (Not sure where I got my color scheme for the jello, but it does look like a European sailing ship flag of some sort doesn't it? )

We made the two batches of jello--1 in each color--and refrigerated them until they were just soft. They were spooned into the cups along with the cool whip and then refrigerated again to render them more solid by morning. The flags at first went in at home, but I then decided to put them in at school so they would fit in the cupcake holders during transport.

Their small size allowed me to easily move them in my cupcake holders, and also for the teacher to dispose of everything. They were, I guess, arguably not a super "sugary" cake treat, and the kids definitely loved them. Way better than stickers or pencils that's for sure!


Sunday, February 1, 2015

CAKE #14 - JACK'S 4TH BIRTHDAY LOS ANGELES KINGS HOCKEY CAKE

Cake #14 Hockey, Los Angeles California KINGS Birthday Cake for Jack's 4th Birthday

JACK just loves the Hockey team, the Los Angeles Kings! He's just turned 4, but has been to quite a few games, and got a great picture with his dad and the Kings' mascot and their Stanley Cup trophy won in the 2014 season. When I was tasked with creating a birthday cake for Jack using the hockey theme, I pondered how I was going to go about it, and  remembered that great picture that had been posted on his mom's Facebook page and snagged it. (It was cool, that without any coordination, his mom also used that same picture for a banner hung on the jumper they got for the party. So we looked really coordinated, without even planning to!) 

To make the edible picture, since I didn't own such a printer, I went to my local Albertson's grocery store and to their bakery where I had heard they would duplicate my photo on edible paper, with a print of that photo and indeed for a mere $10.00 I had the centerpiece of my cake.

I knew the party would be somewhat large and would include both adults and children. I always expect that children prefer something they can eat with their fingers, and not a fork, so unless something else inspires me, I would normally plan a centerpiece cake, surrounded by mini cupcakes  if the kids are little, and maybe regular size cupcakes if they are older. Since my cupcake transporters hold 24 each, and I have 2, I could probably make up to 48, but usually stop at 24 if  the cake is good size, and in this case, it was actually rather large.

For this project I decided to incorporate the Kings colors, which are  white, black silver and purple. Apparently when researching jerseys and colors, purple USED to be dominant, but not in 2014. Black, the emphasized color today, is boring for a cake (and also doesn't taste that good) so I started with the purple and decided to dye the cake itself purple, and would frost it in white with black accents.


I decided for the number of guests, that the cake should be on the large side and made a double size batch of batter in my larger square cake pans. I then planned to split each in half so I would have a four layer cake.. (I wished I had kept a photo of it once cut open. It turned out really pretty inside too though the purple dye (despite that I used a lot)  didn't make it that purple in my chocolate cake. (Jack wanted chocolate). Had I used a white cake recipe, the purple color might have come out stronger, but the dusty dark purple was actually o.k. enough for this application.


 I made this batter from scratch and used my normal "special" flour (cake flour for a lighter texture) and "special bakers sugar, which I have preferred in most applications nowadays since it's more widely available (and not THAT pricey) than it used to be. This cake recipe required white vinegar to help it rise and definitely turned out tasty.


 To split it, I waited until was cool all the way of course, and then using my favorite Wusthoff long, serrated bread knife, cut through it all the way through. I then used my Wilton cake lifter (a great find for less than $20.00 years ago) to move the layers apart. The lifter is just like a huge spatula, but allows it to be moved with minimal stress on any one part of the cake, which could result in breakage.  After separating all four layers onto parchment, and letting it cool some more, I decrumbed it as much as I could and then put it in the freezer. Freezing cakes before frosting, helps keep the crumbs down.
 From these pictures you can see how much darker the baked cake came out (versus the batter.) So if I did this next time, I probably would either add more dye (double the 3 toothpicks full I used) or go with a white cake so the color would stand out more.


 Then I began the frosting. This time I used my regular buttercream, made with powdered sugar, sticks of salted butter, and some vanilla and whipping cream instead of milk. I almost always use the Schilling's vanilla that in my view tastes best (except when I have some of the Williams Sonoma Madagascar Vanilla Paste) which tends to make the frosting more yellow than white. Sometimes I will use a clear vanilla I have for my "whiter" applications, but this time the off white actually looked great with the black and purple, so no harm done and it tasted better.
 After frosting the entire cake and sides , with a basic layer of butter cream,  I patted the edible photo, centered,  onto the cake, tucking the edges gently into the cake and frosting.  I anticipated originally that the photo would be maybe 4 x 6 on a 12 x 12 cake, but the gal who printed it at the store didn't really know that well what she was doing, and they were about to close, so I just took what she produced and it was probably 8 x 11 ish. I was able to trim part of the edges off with scissors, and it fit on the cake pretty well actually, despite it covering more territory on the cake than I originally envisioned.

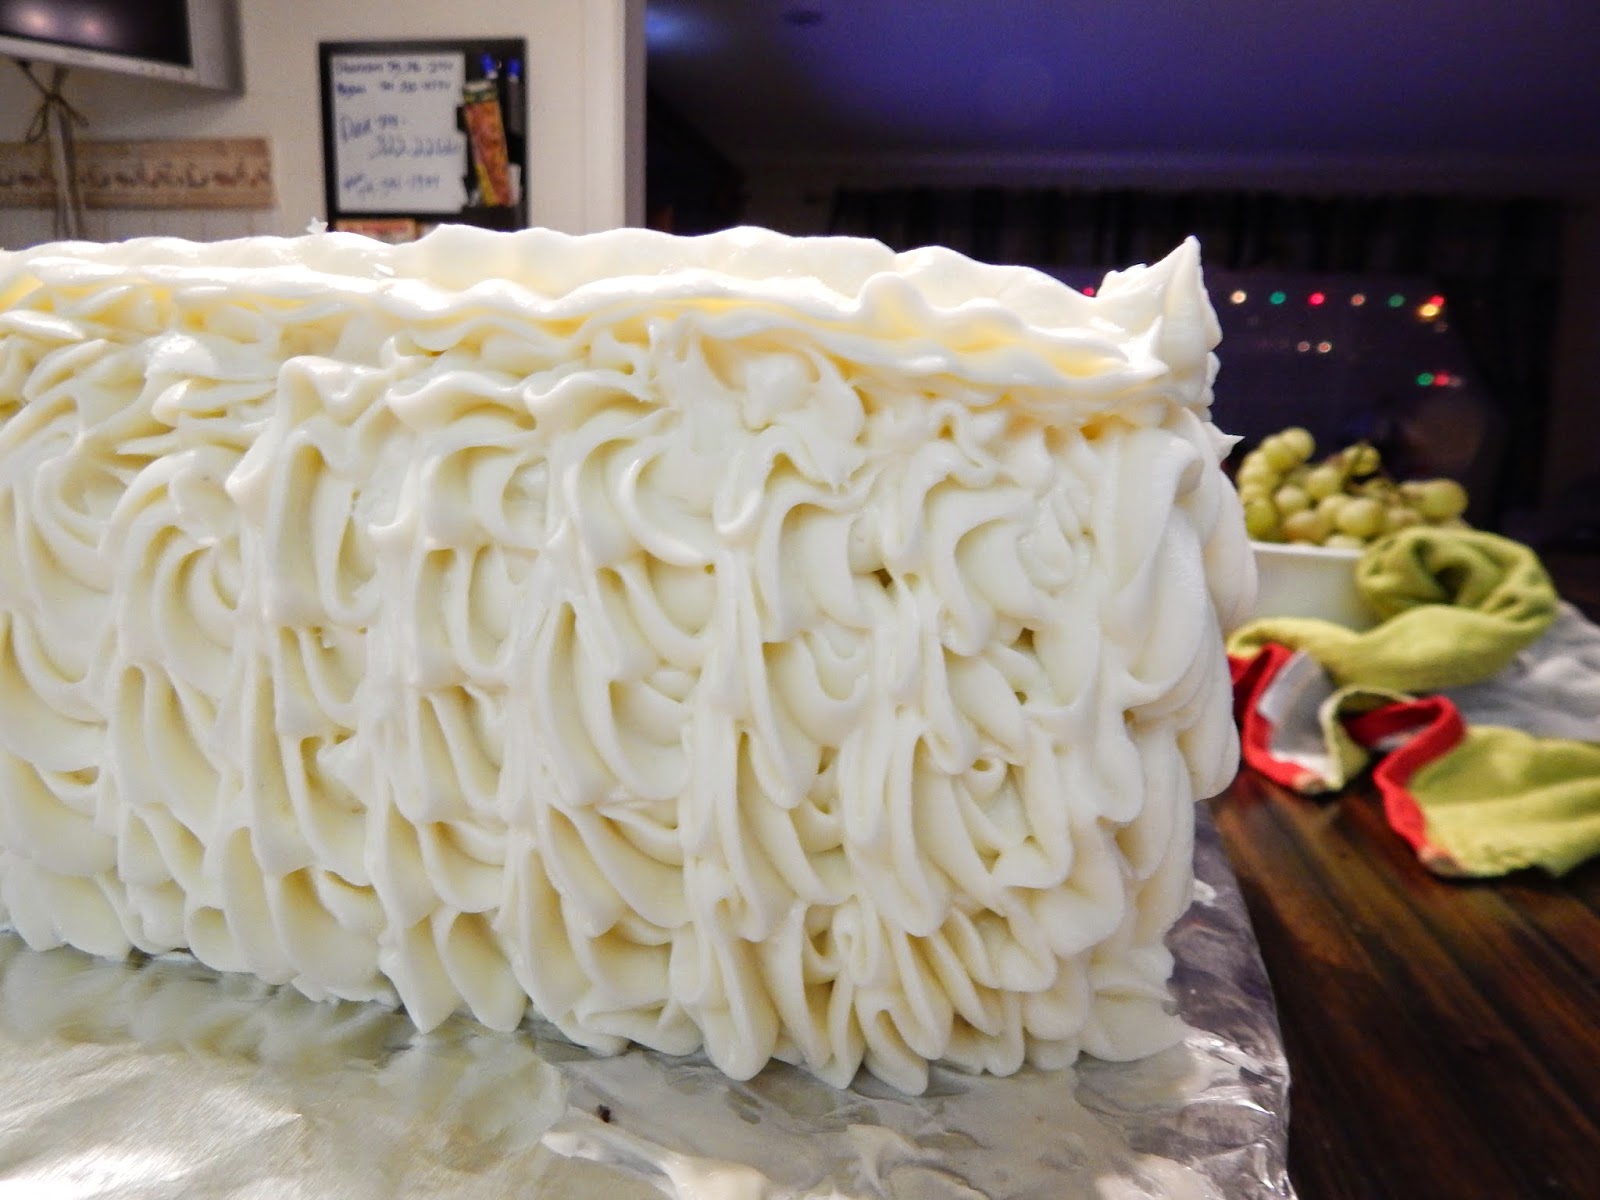
Then to deal with the sides, rather than going smooth, I went with ribbons of frosting, in a star pattern applied with the frosting bag and tip, to the entire sides of the cake. That made it more tasty since there was now a larger amount of frosting on the sides, and it gave it a more intriguing pattern.

I was a little disappointed in the shape, but couldn't do too much about the fact that with 4 layers you are bound to get a little bit of lopside to your cake. If you catch that as you are working on the cake, you can frost the layers in the middle of the cake thicker on one side  to help even the cake out, but here while I thought I had levelled it well, it did sink by its own weight, a little bit to the right. Oh well that does tend to happen on a many layered cake.
 This is how it looked un-dressed. While it came out great, I felt that it still needed color and something to tie it altogether, so I found my little vial of edible silver star flakes and sprinkled them all around the picture on the top. That made it look awesome and finally the fancy I was looking for.

I made some black dyed frosting and used it to write the "Happy Birthday Jack" at the top and bottom and on the diagonal. The picture was so great that I was afraid to cover up any of it with the writing, but had just enough room to squeeze it in and still show Jack and dad's happy face. 


At my local craft store, I found some terrific black and white mini cupcake papers that went with the theme well, and made white cake mini cupcakes. (If I make the cake chocolate, I usually make the cupcakes white, to accommodate taste preferences...even among the kids! :-)  So these were white to contrast with the chocolate in the "main" cake.

 I used the same giant batch of butter cream frosting in my piping bag with the large star tip, and piled the frosting high. I then used my remaining black dyed frosting to put a small black drop on the top of each, in the "shape" of a hockey puck. I doubt anybody bought that the dots were hockey pucks, but it still looked pretty good, and was all tied together well.


Transporting cakes and cupcakes is always a challenge, but I used my two dozen cupcakes stacked tray that I got at Target for less than $20.00 to carry the cupcakes, and had to hand carry the square cake. I have two holders for round cakes but nothing for this size square. Sometimes I will buy the bakery style pink (or usually white) boxes for transport, but since I wasn't going far with this, figured I could put it in the back of the car and drive carefully.

  I do have to say that I rarely let anyone hold my cakes on their lap (or the floor or seat next to them) if I can, as the few times I have done that and something bad naturally happened on the way, I felt compelled to be angry at them, even though it was not their fault that, for example, something shifted as we turned a corner. So now, and so I can blame only myself if something goes wrong, I have become really picky about doing it myself, and invested in a few more bakery boxes and/or plastic domed cake holders (Wilton has a really great round one) that work for me for most applications (except the Barbie cake--soon to be posted--, for which there was just no box or case tall enough to accommodate here. On THAT ride to the party site, on a warm day, with the jiggling of the car and the heat, her dress slipped down and almost off of her cake body, leaving me to scramble how to fix it after we got there. It turned out o.k., but after that debacle, I do take care to plan my transport almost before I even plan the actual cake.)


 At the party, the cake was placed next to the blow up "trophy/Stanley Cup" with the cupcakes surrounding  it and it was, I think, a big hit and I am pretty sure Jack loved it.


Tuesday, December 2, 2014

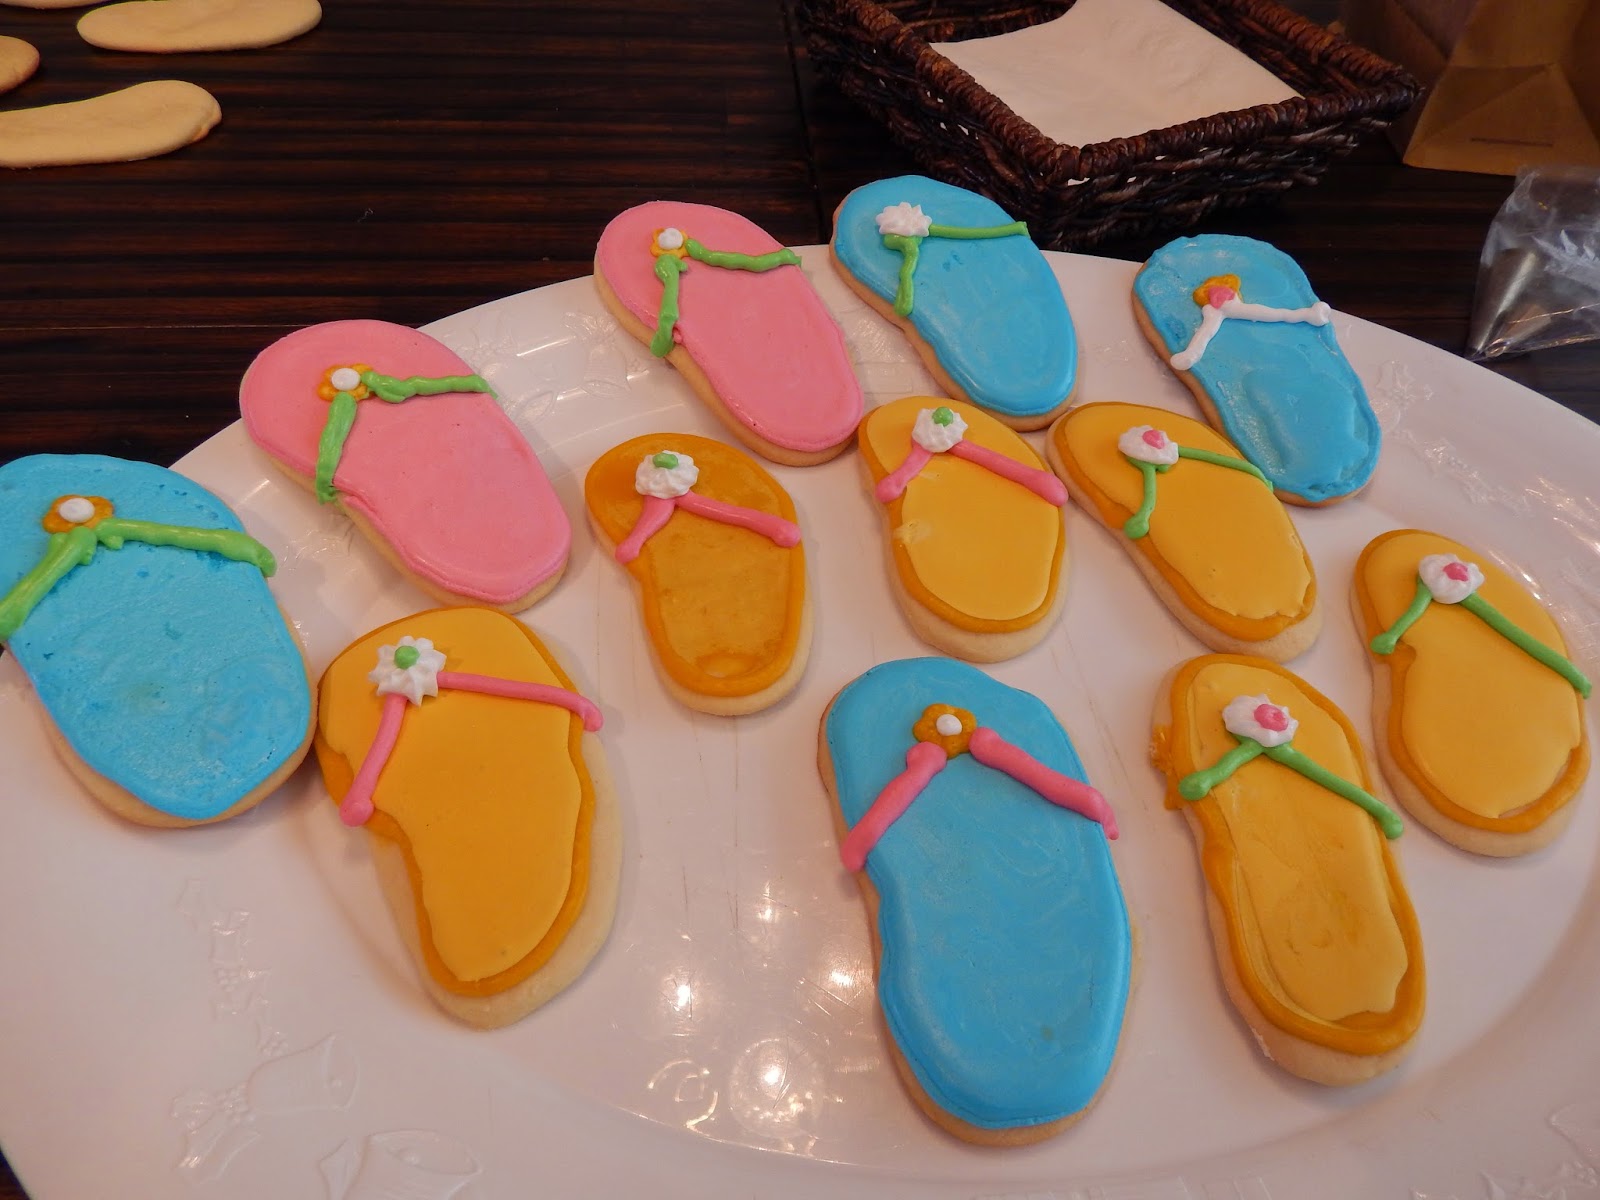
Cake #13 - OK not a "cake" - but my super summer frosted sugar cookies - Surfboards and Flipflops.

Cake #13 - March 2014

* All items in the picture were mine except the red tray of "lolipops" made by another really creative mom. 

This was a very ambitious, but all in all, fun project initiated by our Father/Daughter - Mother/Son Dance that our school held this year for the second time, and this year  with a Hawaiian Luau theme. It was chaired by my sister-in-law and I agreed to help on her committee. I was tasked with getting some snacky type baked goods, since that's my "thing". (No meal at this event, just snacks.) I looked at Costco and just choked, not finding anything THAT good, and realizing like always, a great baked good at a party can also act as a wonderful decoration and centerpiece too. So I figured if I planned ahead well enough, I could just as easily make something great myself and so I did. I knew little kids liked easy to hold and pick up things, and often didn't eat that much of it, so I wanted a mini cupcake and then decided on sugar cookies too. I did make the cupcakes (see below) but which weren't as fun or cool as the cookies.)

I decided on a basic sugar cookie recipe and the flooding technique of frosting--where you make your frosting a little thinner than usual, and pipe it on the edges first. Then you flood the center of the iced-edged cookie to cover the cookie. Some were great..just the right consistency of the frosting, and you could hardly tell the piped edges from the middle.  Some were too watery so the edges were way more visible (the green batch for example), so I have some work to do on perfecting the frosting technique. At one point, I decided to use the "contrast" method if you can't get a "match" and thus piped a distinctly different color on the edge of some of the flip flops (see yellow) and a lighter color flooded in the middle. That actually added some pizzaz, and variety in the design, which made everything richly colorful.


First I went to work on finding what cookie cutters were available and found an inexpensive surfboard and flip flop online and had them shipped. They arrived quickly,  without my paying extra for fast shipping. It's amazing how many different cookie cutter shapes you can get very easily nowadays. I couldn't decide between them so I got both. In hindsight, I wish I knew what size they were in reality, as the flip flop was actually proportionally bigger than the surfboard so they didn't work together that well. So I decided to make one tray of flip flop cookies (maybe for the Father/DAUGHTER event)  and another "tray" of the surfboards (maybe for the Mother/SON event.) Eventually I just did some of each for each event.


The "trays" were actually the really creative part of it all, and that's because I got the idea to serve  all these cookies, on the "sand" at the beach.  And for "sand" I decided to use brown sugar because it looks like sand,  it's safe to put food in it, it's sticky enough to hold the cookies sort of firmly, but not too much, and it's actually edible (and yummy, and goes with the cookies if any gets on one)  plus  you can get a really big bag of it rather inexpensively. 


So I made my cookies on one day, and iced them the next.


I decided that the flip flops would go on this really cool Hawaiian style plastic, retro tray (a really large one) I had just gotten as a gift at Sam's Club for my birthday--ok I bought it for myself for my birthday. :-) So I put some "sand" down and started to lay the cookies "on the sand." It fit perfectly, though until it was completely full and covered with plastic wrap, they did tend to slide around a little bit. 


I then saw some inexpensive dollar store sand pails (it was around Easter time) and got me four of them. I figured I would fill them with the "sand" and stick the surfboards in it--8 to 10 boards per pail should do. (Then I would use them as actual Easter baskets (or heck, beach sand pails) after we were done with them in this project!) But alas I also figured I didn't want to spend/waste THAT much brown sugar in each pail, so decided to buy some bulk flour and put a large ziploc bag full of the flour in the bottom of each pail first just to take up a lot of the space. (I did have to really squeeze the air out of the bags to ensure the brown sugar sat down all the way in the pail.) By putting it in the plastic bags, I would seal it so I could use/reuse it for baking later without actually wasting it if I hadn't bagged it. (I have just finished using the last of the flour in those bags at Thanksgiving!) Then I would pour the brown sugar over that so only the top 3" or so of the sugar would hold the cookies upright, and be what's visible.


 Lastly, I needed a finishing touch of a "Surf's Up" sign or something (we used "Hang Ten", "Life's a Beach" and "Aloha" too) and that's where my artsy girls came in to make them for me, then mount them on construction paper, and then tape them to straws which we then inserted in the sand. 


Voila. Pretty awesome finished product, AND had to do it all twice--as the Mother/Son event was on one day and the Father/Daughter on an entirely different day a week apart! 


Whew. Glad that month is over.

AND, if that weren't enough, I did make the Hawaiian colored mini cupcakes to go with it all too. It was very hot out for the first event, so I worried the buttercream would melt in transport.  So this time, I  frosted them all, and put them in the freezer a few hours before transport. That way I got them to the school courtyard and displayed on their stand without too much risk of mushing them. The frosting was my normal buttercream, with a spray color tint in the darker "island" colors.


I just happened to have some plain red plastic plates (i.e. less chance of breaking in transport and around kids, than glass) and borrowed my sister's triple tier plate stand that they were displayed and served on. (I do have my eye on one of my own --with little beads and stuff--that I am hoping Santa brings me for Christmas ;-) --Meg, if you want the link, I will email it to you! Love MOM. 

 ALOHA until next year's event!